


With the Greenhood payment card, you can instantly spend money at any store that accepts VISA. You can also use the card as a credit card for online purchases.The card is powered by our partner Gnosis Pay, which lets you easily link your crypto to everyday spending.
Already have a Gnosis Pay account?
In that case, you can follow the steps on this page.
Don’t have a Gnosis Pay account yet?
Follow the steps below. Make sure you have a valid ID document and (digital) proof of address ready.
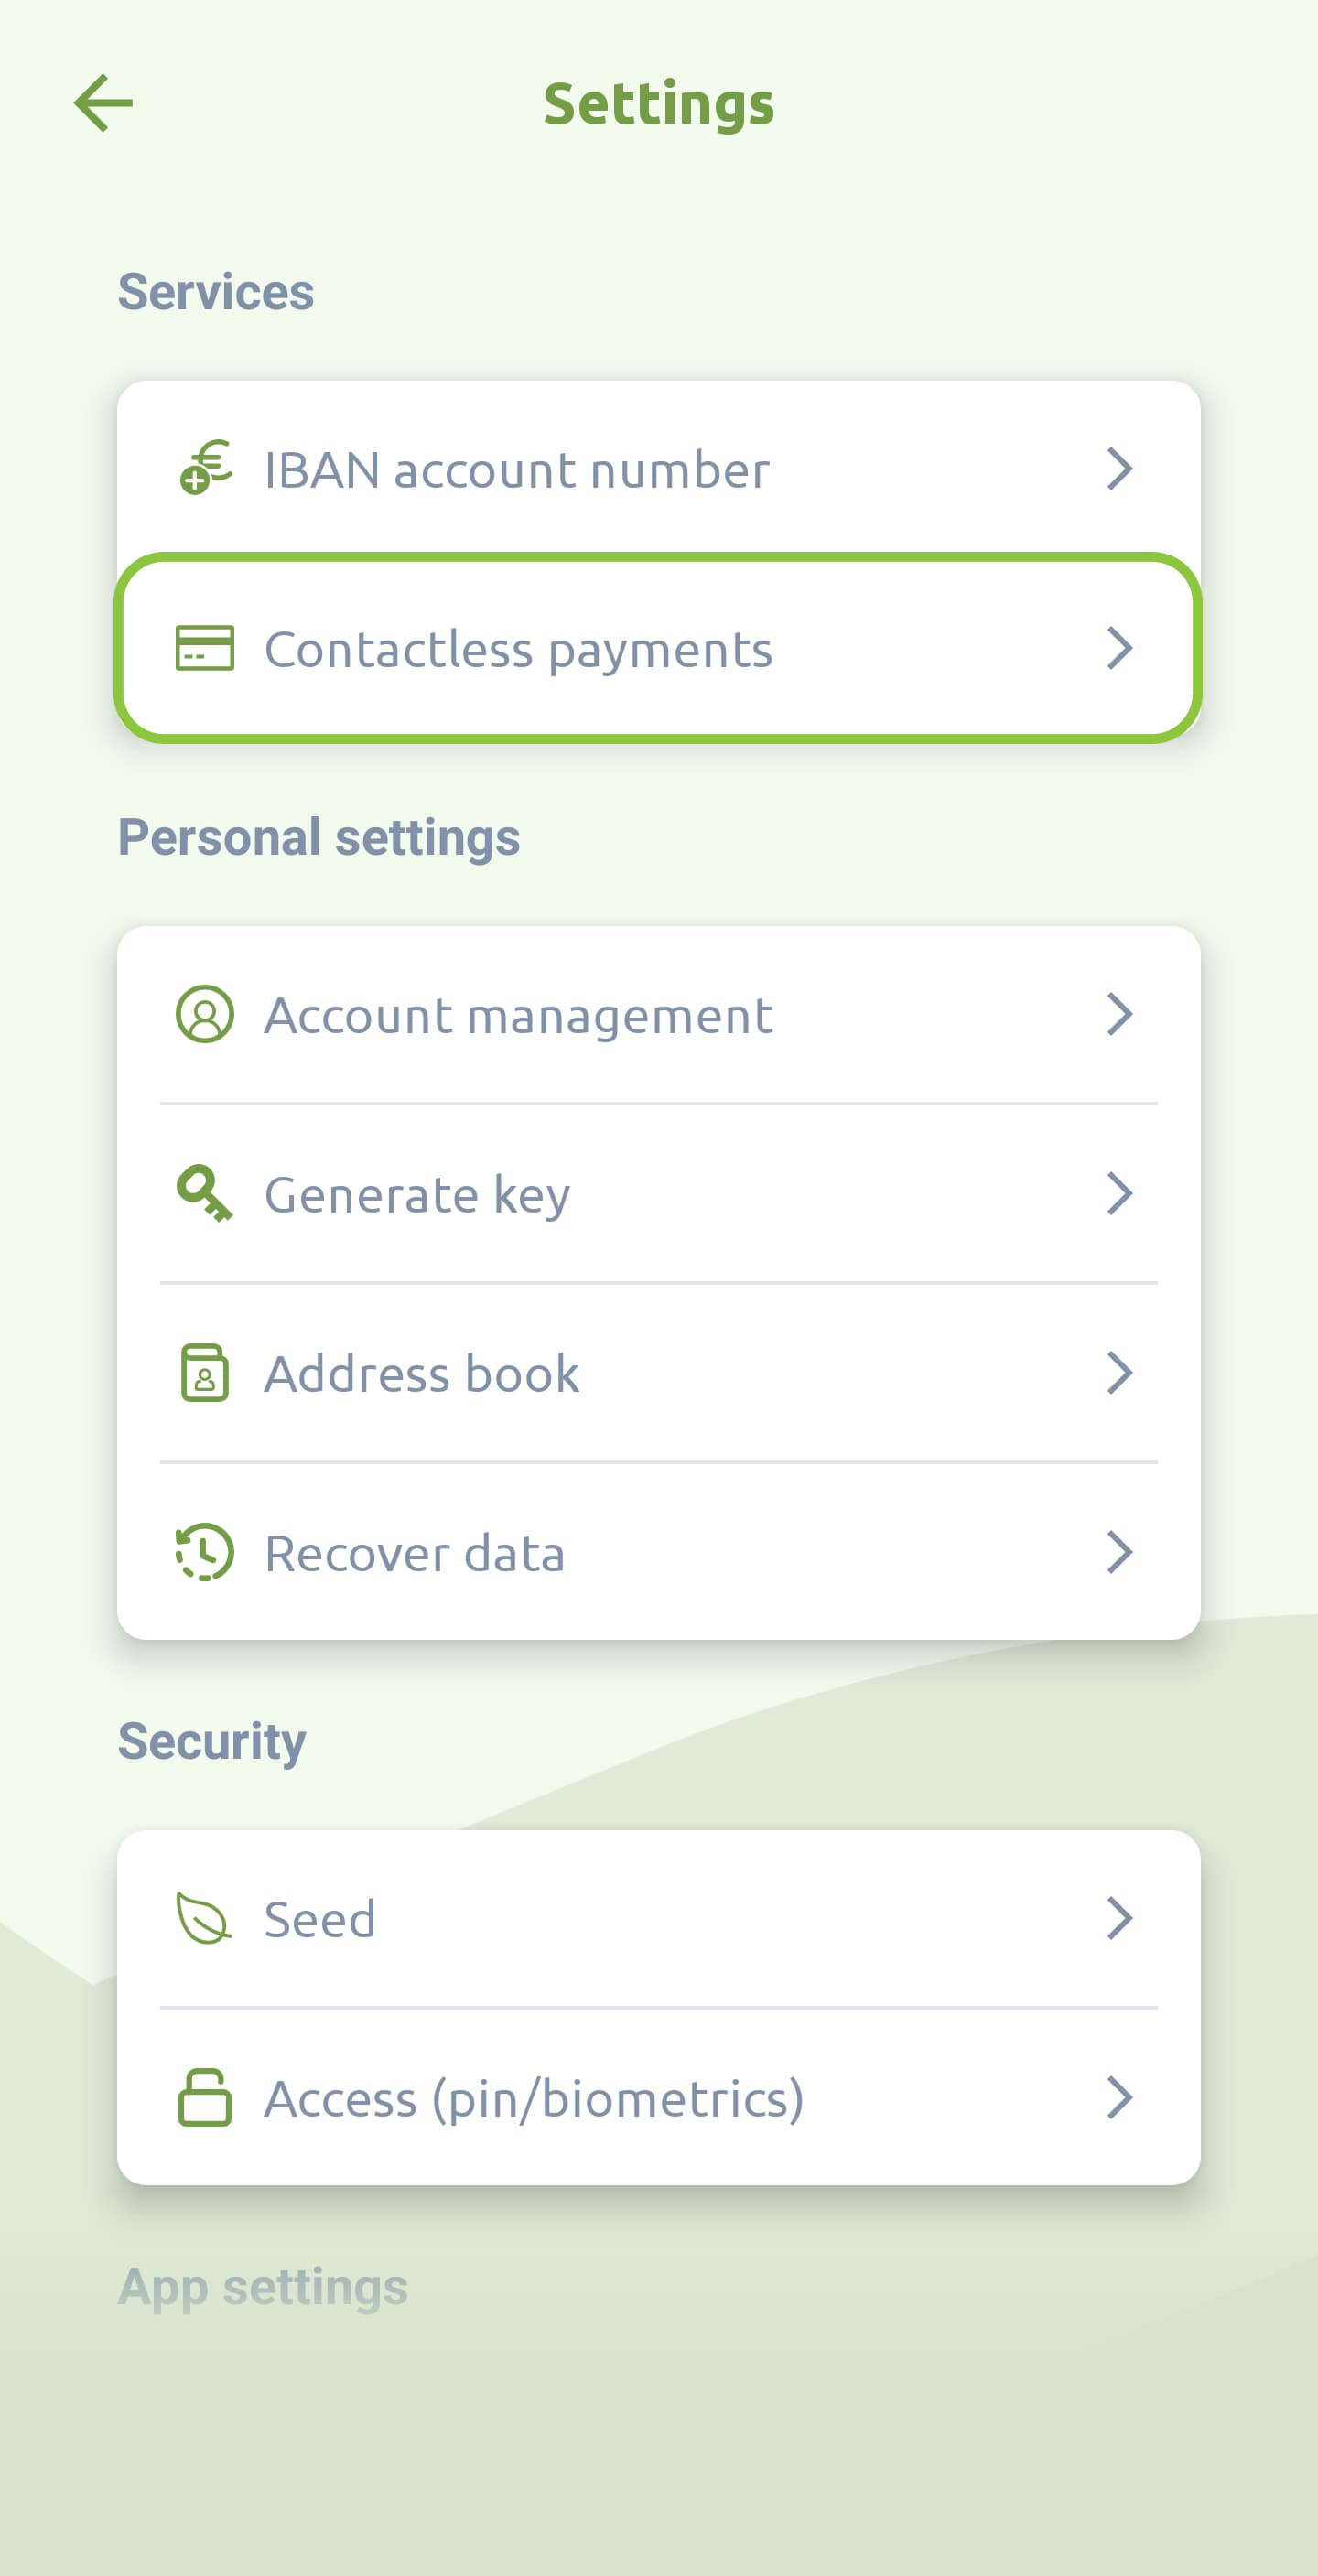
1. Open the Greenhood Wallet and go to Settings > Contactless Payments
2. Tap 'Start sign-up'
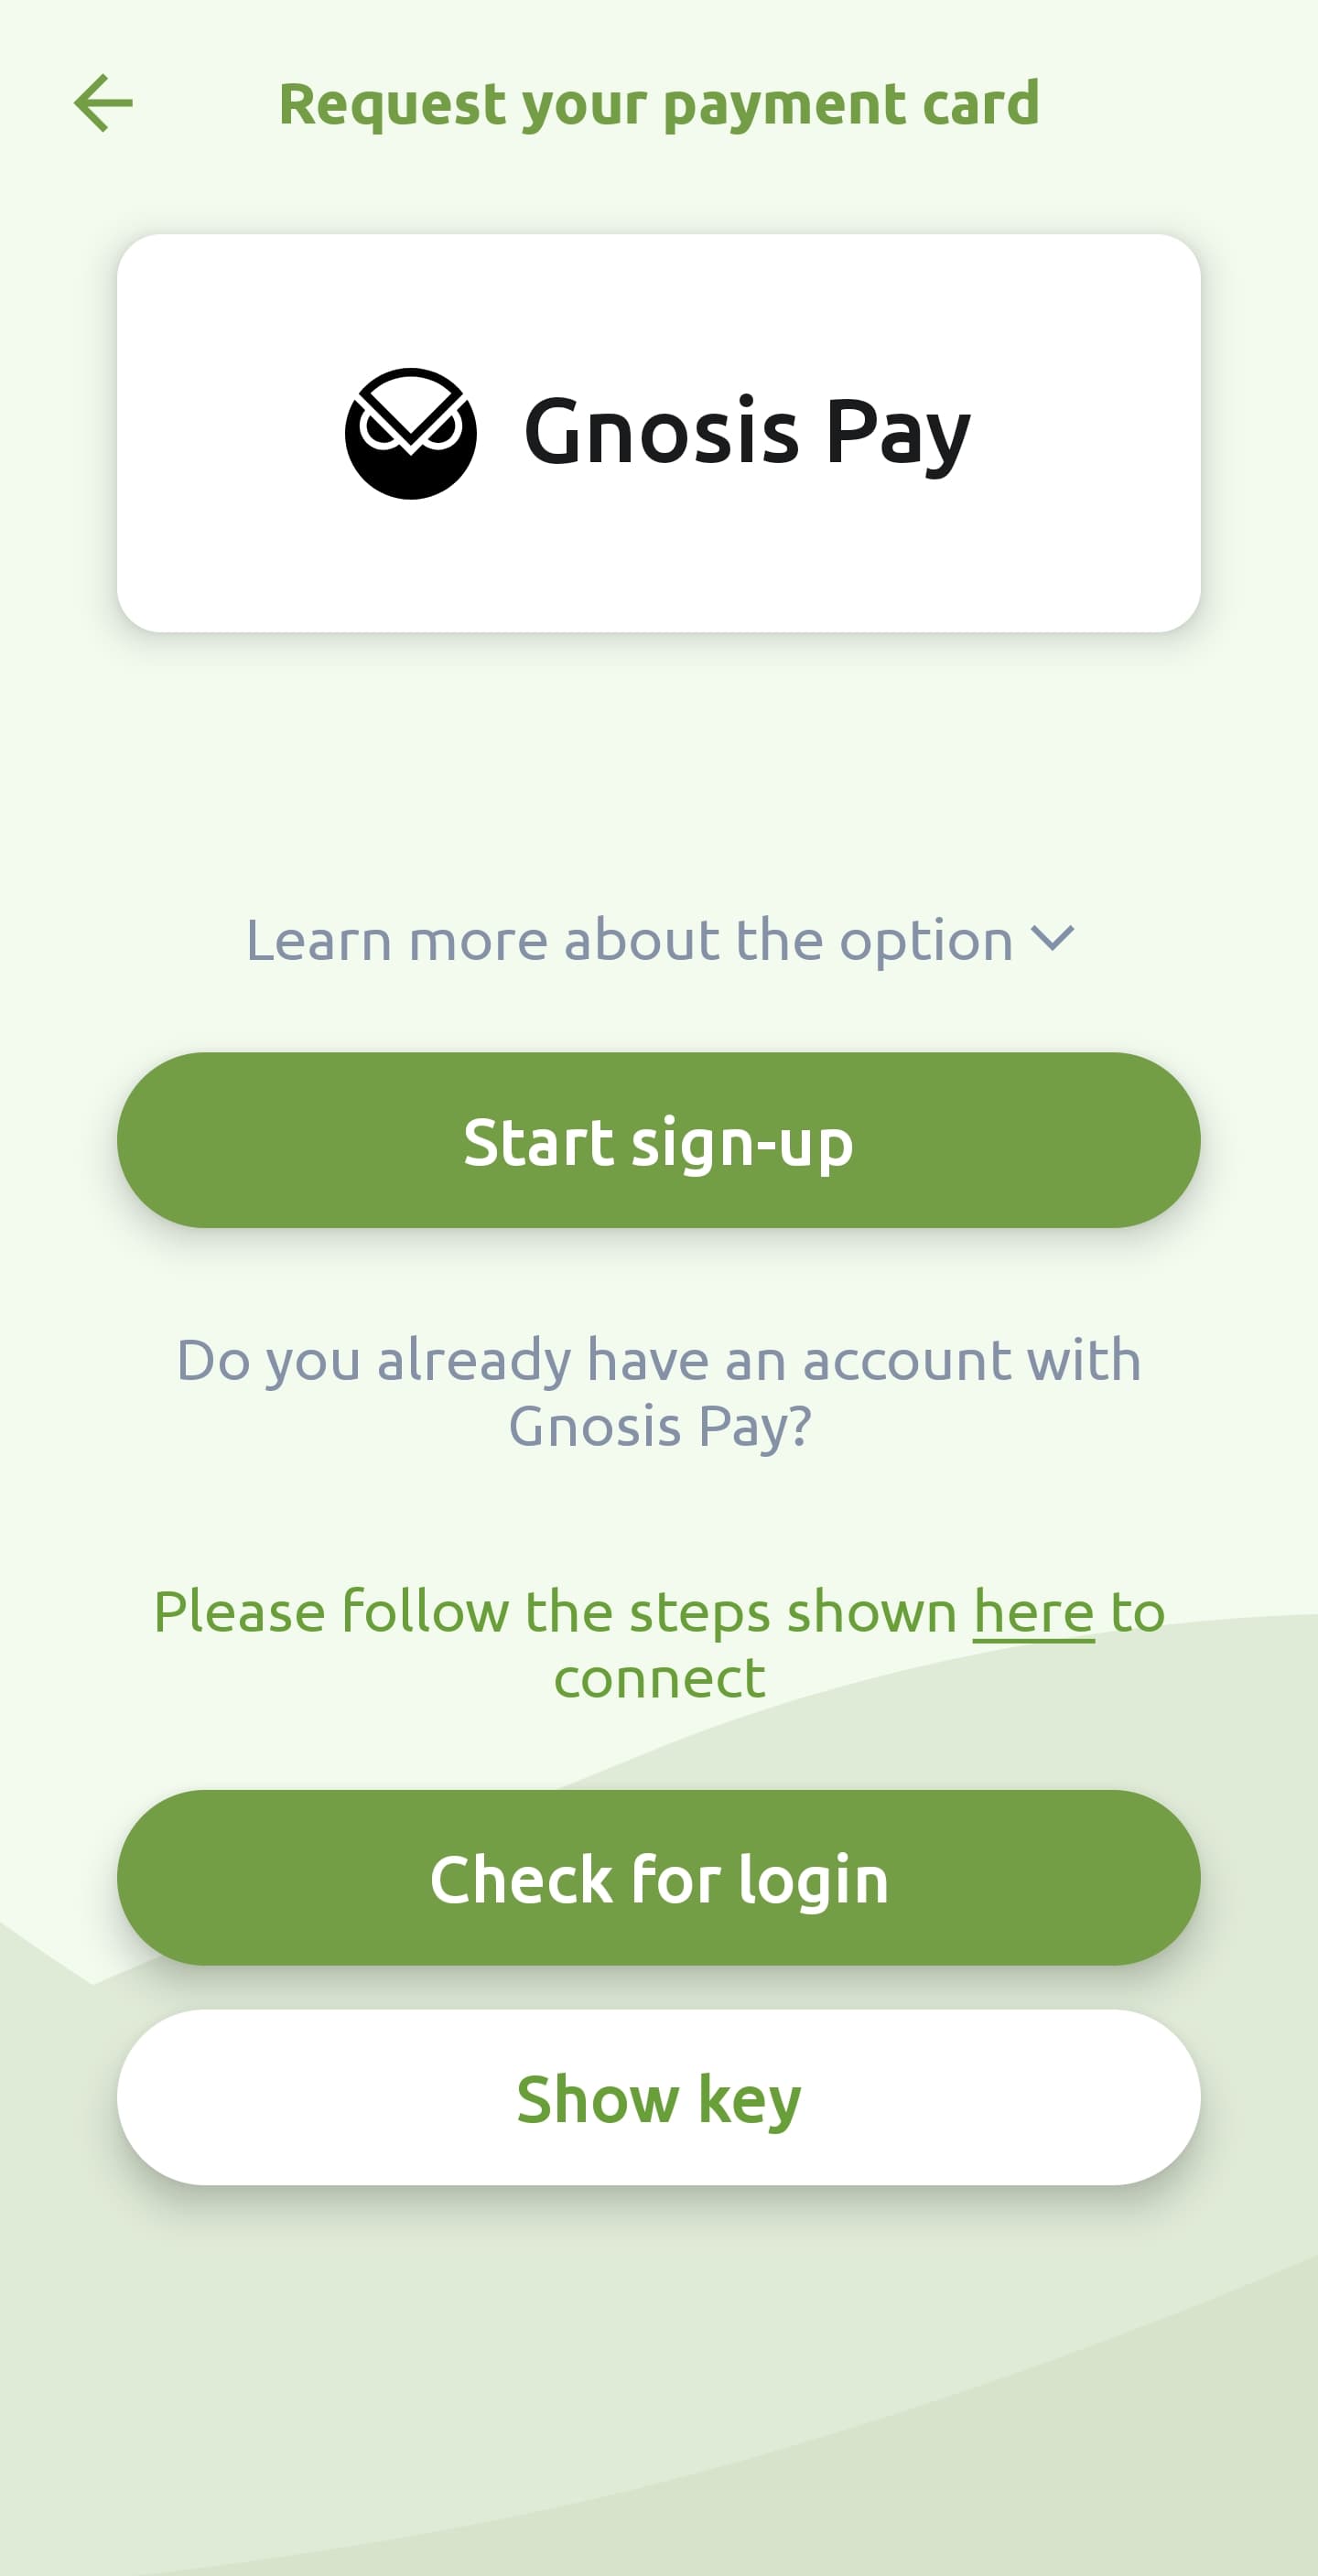
3. Complete the onboarding steps:
- Verify your email address
- Answer a short questionnaire
- Go through the identity verification process
- Verify your phone number
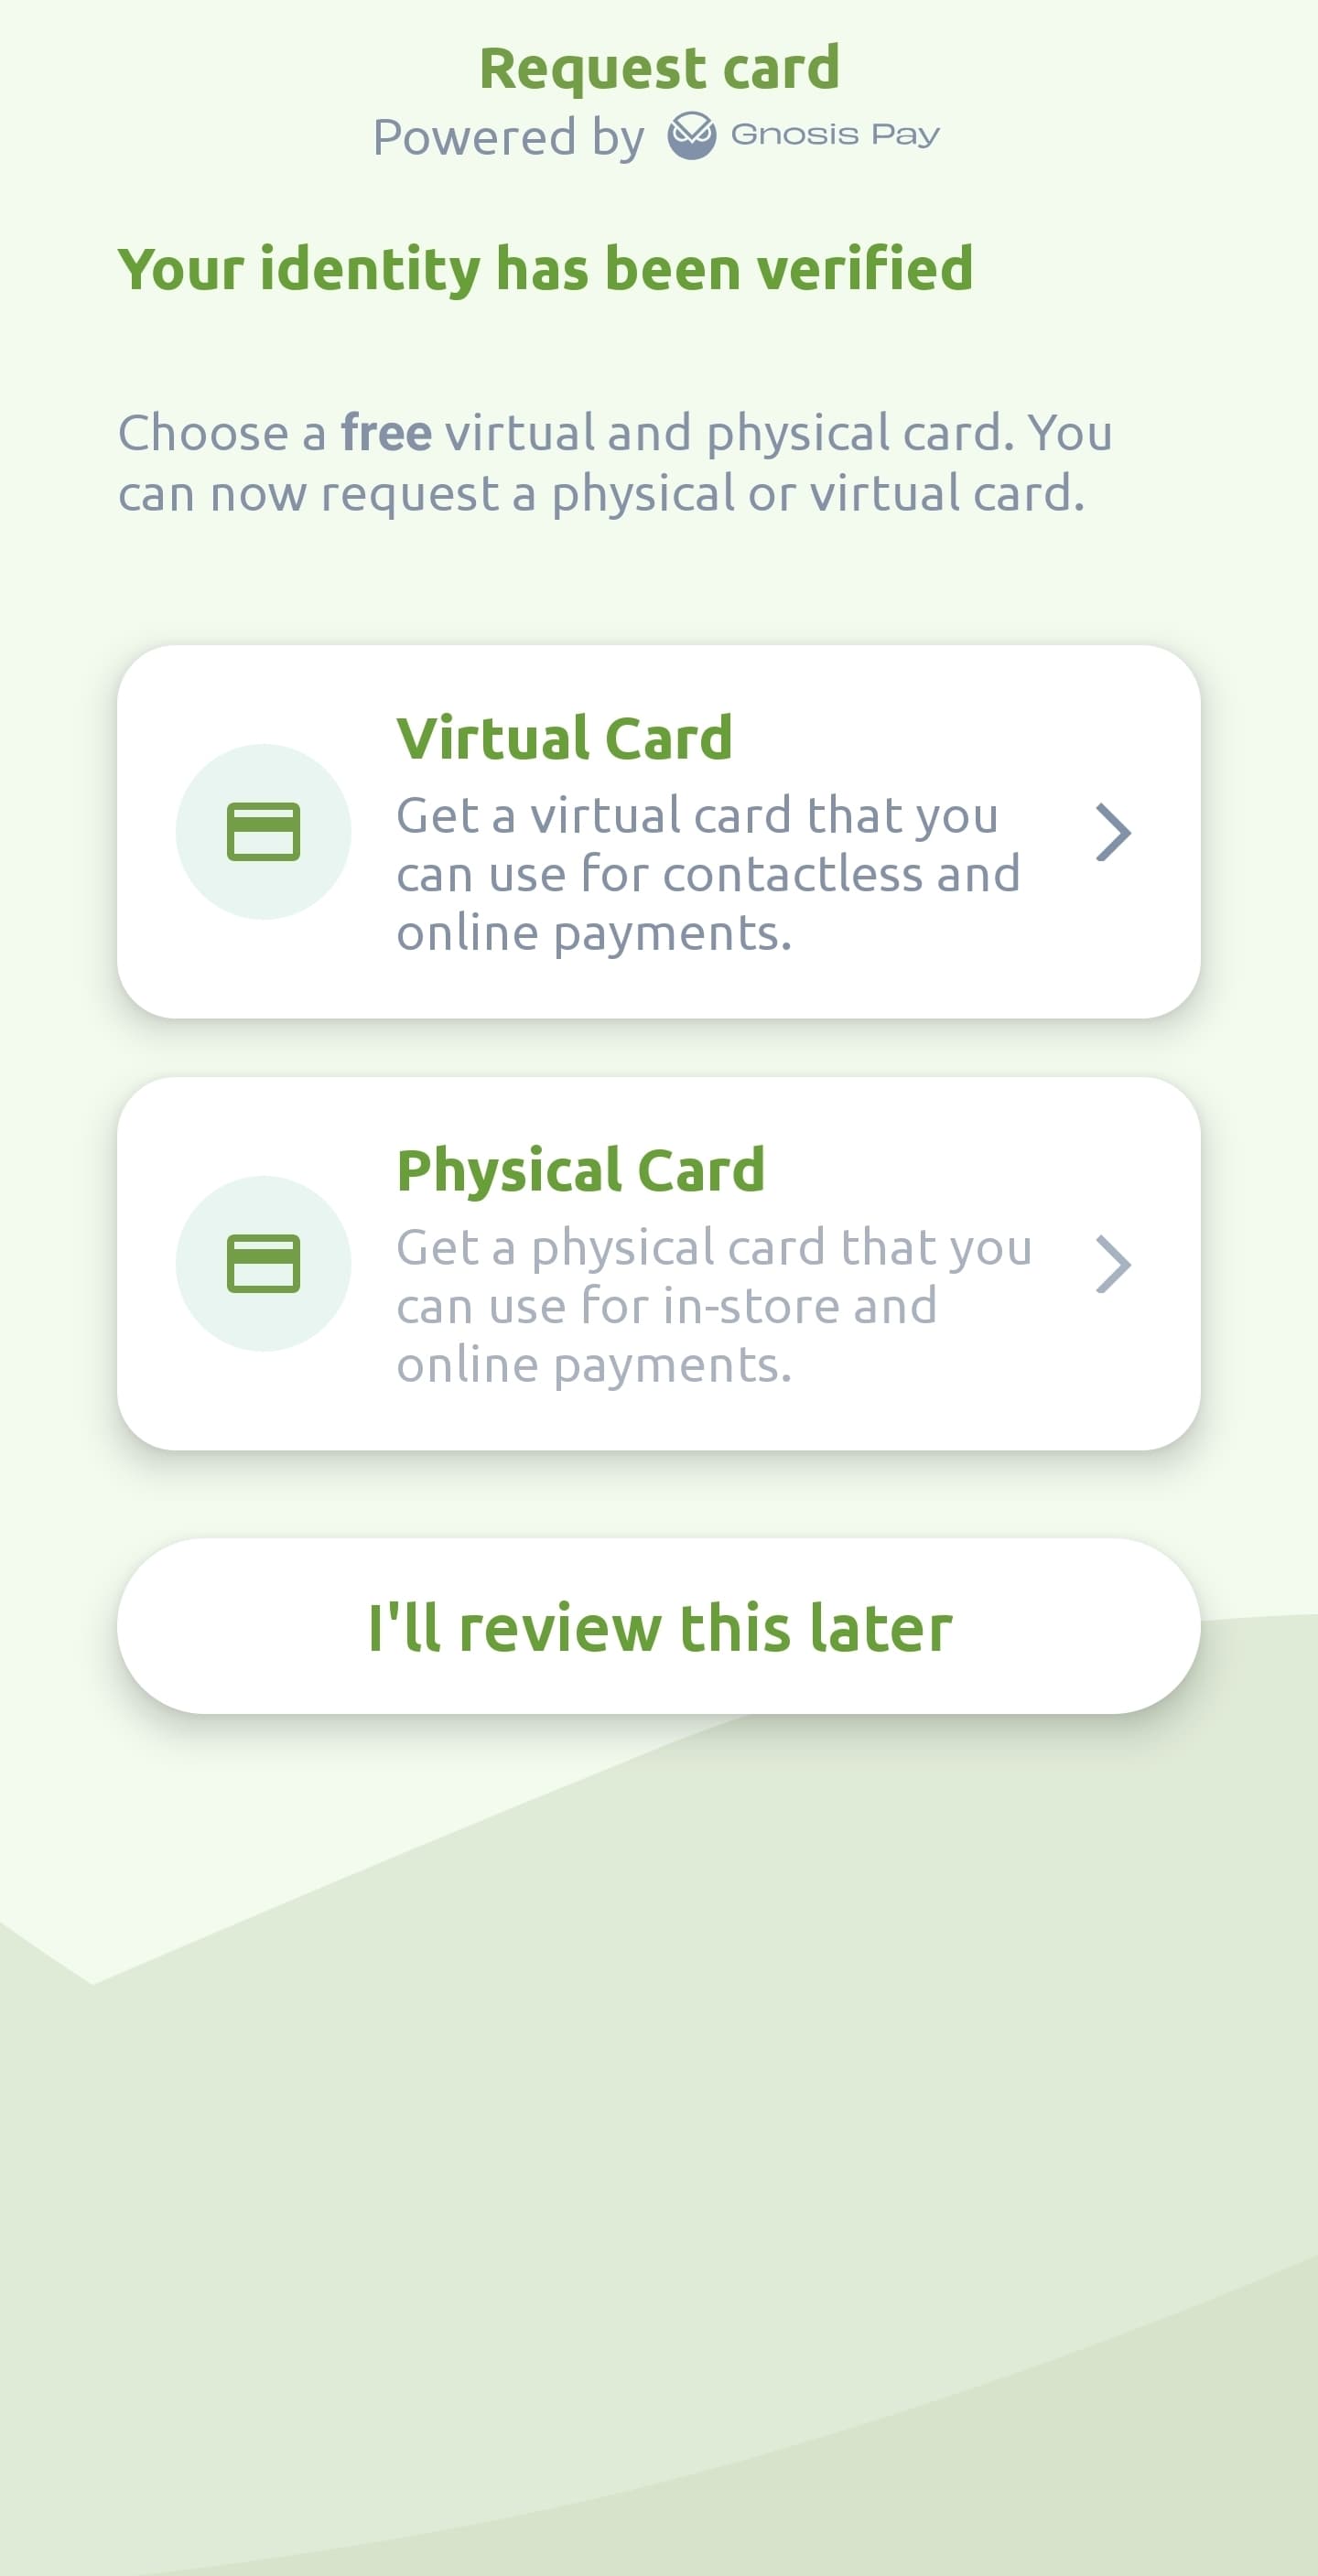
4. Once completed, you can request your free payment card:
- Virtual card: available immediately after setup
- Physical card: sent to your selected address
Extra steps for the physical card
- Set your PIN (optional) - If you skip this step, a PIN will be generated automatically. You can always change it later.
- Activate your card once it arrives - You can do this via Settings > Contactless Payments. This protects you in case the card gets lost during shipping.
Congratulations!
🎉 Congrats! You now have a working Greenhood payment card you can use in stores and online. You can also add the card to Google Wallet or Apple Wallet to pay contactlessly with your phone:
How do I add the card to Google Wallet?
How do I add the card to Apple Wallet?
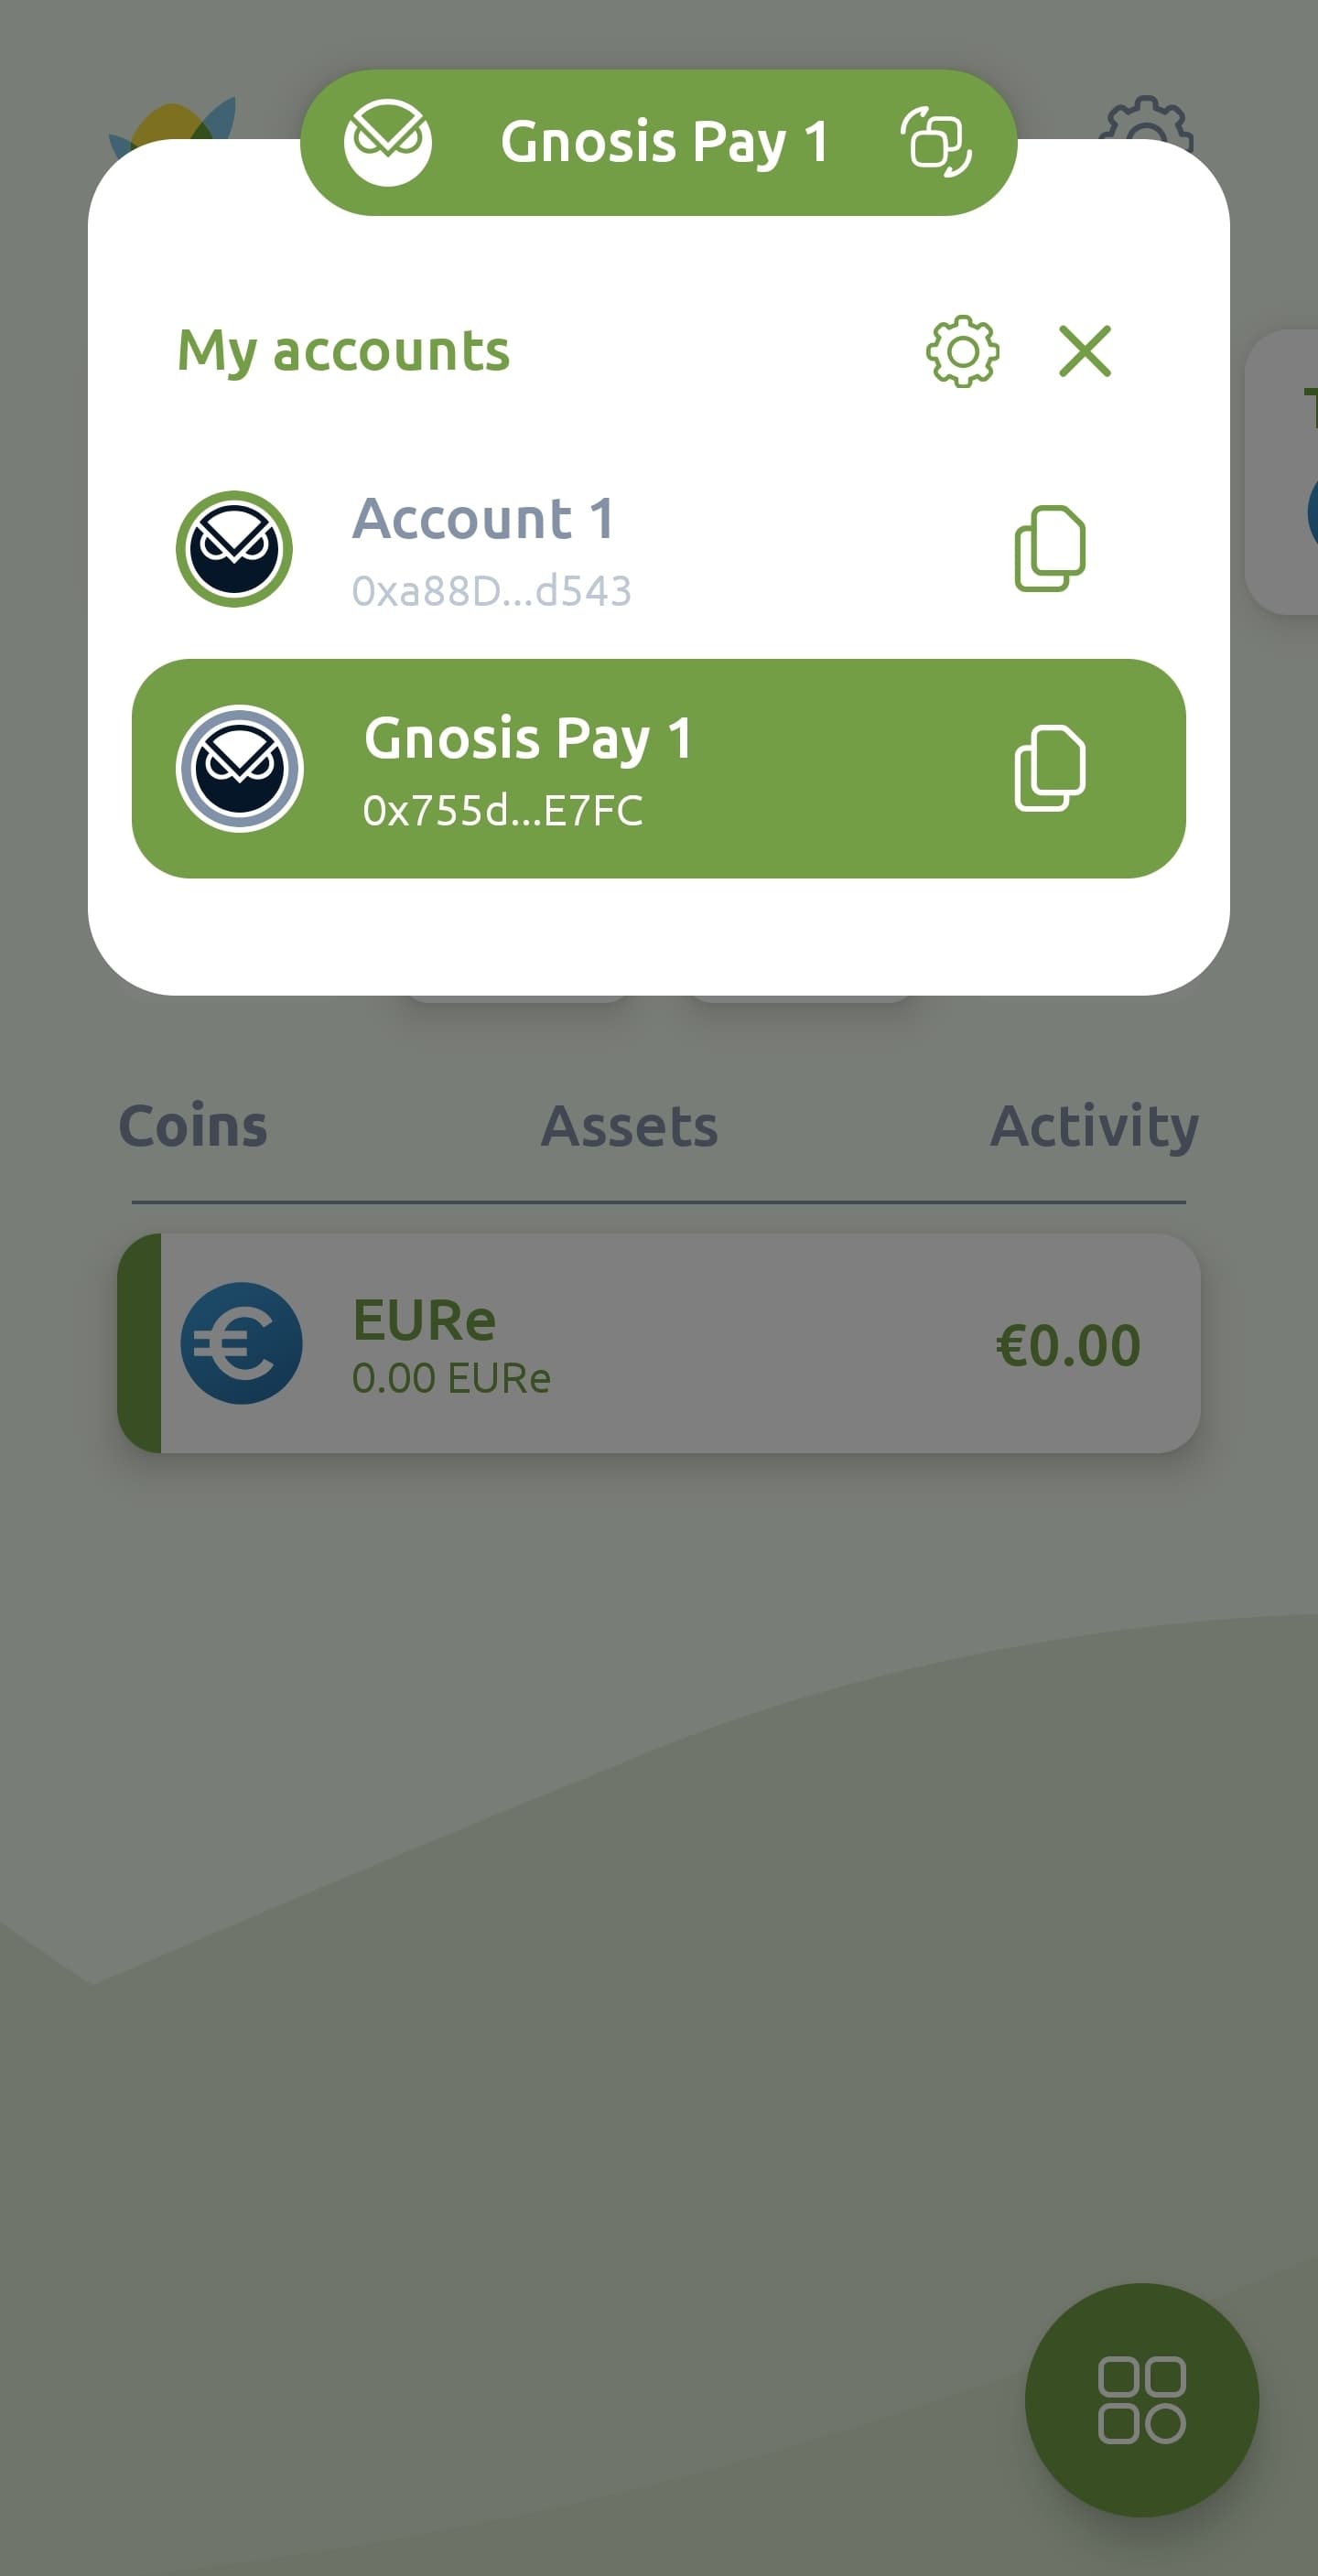
By completing this process, your Gnosis Pay account is now linked to your Greenhood Wallet. This means you’ll be able to:
- View your Gnosis Pay payment account directly in the app
- Manage card features like viewing or changing your PIN
Questions?
Check our FAQ, or reach out to support@greenhoodwallet.com if you need help.
